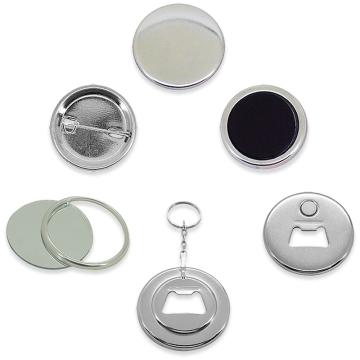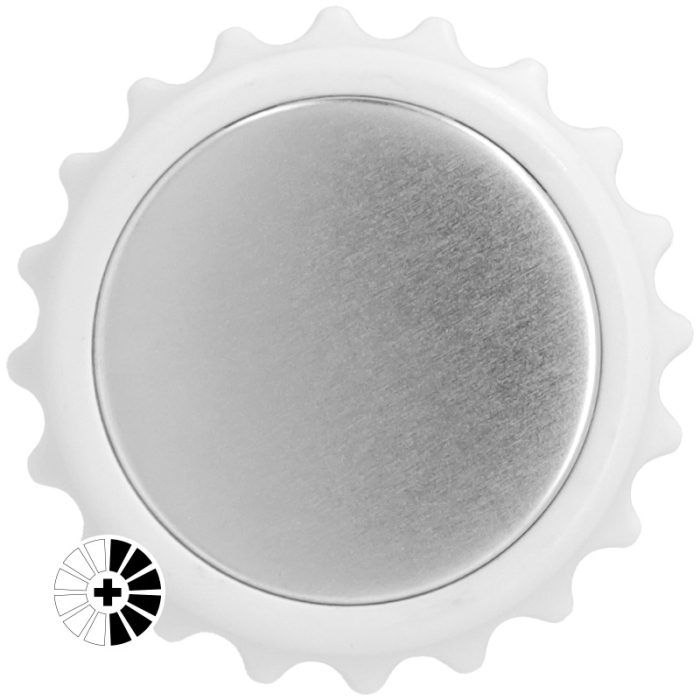
Metal plate with black or white plastic base in the shape of a crown cap
One side of the base is used to place the badge once personalised; the other side has a metal bottle opener with 2 magnets to attach it to any magnetic surface
The badge includes: 1 front metal plate, 1 back plate, 1 plastic mylar and 1 adhesive to attach the badge to the bottle opener
THINGS TO KEEP IN MIND
The badges are compatible with both the EVOLUTION manual badge-making machine and the pneumatic one(Ref. 033318, 038067, 038068). We recommend testing for other machines
In Related Products, you will find the suitable moulds to personalise these badges (Ref. 028637)
TIPS & TRICKS
Create beautiful personalised bottle openers for weddings, communions or christenings
Personalise with original designs and include them in your catalogue as souvenirs or promotional items
DIMENSIONS
Bottle opener (cm)
Ø8 x 1.5
Printable badge (mm)
Ø58
Magnet (mm)
Ø1.1
Weight (g)
56
HOW TO PERSONALISE ROUND BADGES?
STEP 1: PRINT THE DESIGN
Create the design you want to place on the badge
Prepare a template according to the size and shape of the badge. Remember that the template should provide an additional, outer edge to fold over and attach the design to the back of the badge
Print your design on paper, with your usual printer. It is recommended to use 100-110 gsm paper sheets. You can also customise it with other materials such as fabric or vinyl
Download the template to print your button badges in eps, psd or pdf format.
STEP 2: TRIM THE DESIGN
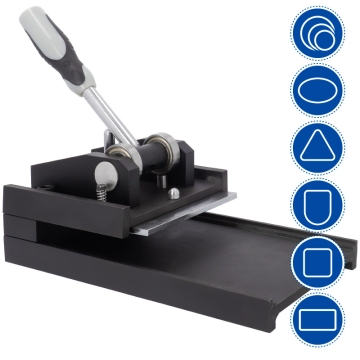
Cut the printed paper on the outermost edge. You may use scissors or a utility knife. However, it is advisable to use a punch die cutter to cut out several designs at once. It will help you gain precision and speed, achieving a straight, clean, and even cut (see Related Products)
STEP 3: ASSEMBLE THE BADGES
Prepare the badge making machine. For this example, we will suppose you are using a manual one. If you own a pneumatic machine, the steps are very similar
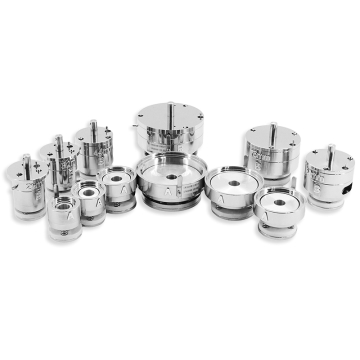
Install the Ø58 mm round mould
Place the front of the badge on the mould's Part A, with the sharp metal edge facing downwards
Place the design you previously trimmed on this plate and cover it with the plastic mylar
Rotate the base until Part A is aligned with the Upper Part
Hold the machine with one hand and push the lever down with the other one. Apply pressure and pull it back up. The front plate will remain on the Upper Part of the mould
Place 1 or 2 washers on Part B. These washers come with the mould. The number of washers to use will depend on the type of back plate. It is advisable to test beforehand to determine if it is necessary to use them and if so, how many are required
Place the back of the badge on Part B, with the sharp metal edge facing up. Try to align the plate with the positioning pin to ensure its correct orientation.
Rotate the base of the machine until the Upper Part aligns with Part B
Hold the machine with one hand and push the lever down with the other one. Apply pressure and pull it back up
Rotate the base of the machine again and remove the personalised badge
https://www.brildor.com/en/magnetic-bottle-opener-d58mm50417Magnetic Bottle Opener Ø58mm<p class="enlace"><a id="know-more"></a> </p>
<h2>More information about the Ø58mm magnetic bottle opener</h2>
<p> </p>
<p><strong>INDEX</strong></p>
<p>> <a href="#know-more1">Description</a></p>
<p>> <a href="#know-more2">Things to keep in mind</a></p>
<p>> <a href="#know-more3">Tips & tricks</a></p>
<p>> <a href="#know-more4">Dimensions</a></p>
<p>> <a href="#know-more5">How to personalise round badges?</a></p>
<p> </p>
<p><a name="know-more1"></a></p>
<p><strong>DESCRIPTION</strong></p>
<ul>
<li>Metal plate with black or white plastic base in the shape of a crown cap</li>
<li>One side of the base is used to place the badge once personalised; the other side has a metal bottle opener with 2 magnets to attach it to any magnetic surface</li>
<li>The badge includes: 1 front metal plate, 1 back plate, 1 plastic mylar and 1 adhesive to attach the badge to the bottle opener </li>
</ul>
<p> </p>
<p><a name="know-more2"></a></p>
<p><strong>THINGS TO KEEP IN MIND</strong></p>
<ul>
<li>The badges are compatible with both the EVOLUTION manual badge-making machine and the pneumatic one(Ref. 033318, 038067, 038068). We recommend testing for other machines</li>
<li>In <strong>Related Products</strong>, you will find the suitable <a href="https://www.brildor.com/en/moulds-for-badge-making-machines-round" target="_blank" rel="noopener">moulds</a> to personalise these badges (Ref. 028637)</li>
</ul>
<p> </p>
<p><a name="know-more3"></a></p>
<p><strong>TIPS & TRICKS</strong></p>
<ul>
<li>Create beautiful personalised bottle openers for weddings, communions or christenings</li>
<li>Personalise with original designs and include them in your catalogue as souvenirs or promotional items</li>
</ul>
<p> </p>
<p><a name="know-more4"></a></p>
<p><strong>DIMENSIONS</strong></p>
<table width="487">
<tbody>
<tr>
<td><strong>Bottle opener (cm)</strong></td>
<td><span class="azul-negrita">Ø8 x 1.5<br></span></td>
</tr>
<tr>
<td><strong>Printable badge (mm)</strong></td>
<td><span class="azul-negrita">Ø58<br></span></td>
</tr>
<tr>
<td><strong>Magnet (mm)<br></strong></td>
<td><span class="azul-negrita">Ø1.1</span></td>
</tr>
<tr>
<td><strong>Weight (g)<br></strong></td>
<td><span class="azul-negrita">56<br></span></td>
</tr>
</tbody>
</table>
<p> </p>
<p><a name="know-more5"></a></p>
<p><strong>HOW TO PERSONALISE ROUND BADGES?<br></strong></p>
<p><strong>STEP 1: PRINT THE DESIGN</strong></p>
<ul>
<li>Create the design you want to place on the badge</li>
<li>Prepare a template according to the size and shape of the badge. Remember that the template should provide an additional, outer edge to fold over and attach the design to the back of the badge</li>
<li>Print your design on paper, with your usual printer. It is recommended to use <span class="azul-negrita">100-110 gsm</span> paper sheets. You can also customise it with other materials such as fabric or vinyl</li>
</ul>
<p><strong>Download the template</strong> to print your button badges in <a title="Button badge template eps" href="http://www.brildor.com/media/upload/descargas/Plantilla_chapas_brildor.eps" target="_blank" rel="no-follow noopener">eps</a>, <a title="Button badge template psd" href="http://www.brildor.com/media/upload/descargas/Plantilla_chapas_brildor.psd" target="_blank" rel="no-follow noopener">psd</a> or <a title="Button badge template pdf" href="http://www.brildor.com/media/upload/descargas/Plantilla_chapas_brildor.pdf" target="_blank" rel="no-follow noopener">pdf format</a>.</p>
<p> </p>
<p><strong>STEP 2: TRIM THE DESIGN</strong></p>
<ul>
<li>Cut the printed paper on the outermost edge. You may use scissors or a utility knife. However, it is advisable to use a punch die cutter to cut out several designs at once. It will help you gain precision and speed, achieving a straight, clean, and even cut (see <strong>Related Products</strong>)</li>
</ul>
<p> </p>
<p><strong>STEP 3: ASSEMBLE THE BADGES</strong></p>
<ul>
<li>Prepare the badge making machine. For this example, we will suppose you are using a manual one. If you own a pneumatic machine, the steps are very similar</li>
<li>Install the <span class="azul-negrita">Ø58 mm </span>round mould</li>
<li>Place the front of the badge on the mould's Part A, with the sharp metal edge facing downwards</li>
<li>Place the design you previously trimmed on this plate and cover it with the plastic mylar</li>
<li>Rotate the base until Part A is aligned with the Upper Part</li>
<li>Hold the machine with one hand and push the lever down with the other one. Apply pressure and pull it back up. The front plate will remain on the Upper Part of the mould</li>
<li>Place 1 or 2 washers on Part B. These washers come with the mould. The number of washers to use will depend on the type of back plate. It is advisable to test beforehand to determine if it is necessary to use them and if so, how many are required</li>
<li>Place the back of the badge on Part B, with the sharp metal edge facing up. Try to align the plate with the positioning pin to ensure its correct orientation.</li>
<li>Rotate the base of the machine until the Upper Part aligns with Part B</li>
<li>Hold the machine with one hand and push the lever down with the other one. Apply pressure and pull it back up</li>
<li>Rotate the base of the machine again and remove the personalised badge</li>
</ul>
<p> </p>
<p> </p>https://www.brildor.com/media/catalog/product/c/h/chapas-abrebotellas-iman-forma-chapa-botella.jpg0.99instock00.99000https://www.brildor.com/media/catalog/product/c/h/chapas-abrebotellas-iman-forma-chapa-botella.jpg1737425353446865041450439/Badges/Badges/Customisable Badges2023-07-17T11:13:28+0000