HOW TO CUSTOMISE RECTANGULAR BADGES WITH THE EVOLUTION MACHINE?
STEP 1: Print the design
Always use a template with a cutting and bleed guide
Ensure the design has a margin for folding
Print on 100–110 g/m² paper for optimal finish
STEP 2: Cut out the design
Cut along the outermost edge of the template
You can use scissors, a die-cutter, or a plotter depending on the volume and precision required
STEP 3: Assemble the badge
Install the rectangular mould 50 x 90 mm
Part A of the mould:
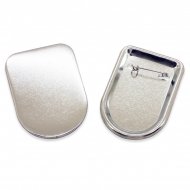
Place the front plate (sharp edge down)
Position the cut-out design on top
Add the protective sheet
Rotate the base to align Part A with the upper part
Press the lever and lift it back up
Part B of the mould:
Place the back plate with the sharp edge up, aligning it with the pin. For mirror badges: first the frame (metal edge up), then the mirror (facing down), and finally the cardboard stand
Rotate the base to align it with the upper part
Press the lever again
Your badge is now ready
For the magnet model, adhere the magnet to the back of the badge
https://www.brildor.com/en/rectangular-badges-50x90mm23787Rectangular Badges - 50x90mm<p><a name="know-more1"></a></p>
<h2>More information about the Rectangular Badges - 50x90mm</h2>
<p> </p>
<p><strong>INDEX</strong></p>
<p>> <a href="#know-more1">Description</a></p>
<p>> <a href="#know-more2">Things to keep in mind</a></p>
<p>> <a href="#know-more5">Templates for customisation</a></p>
<p>> <a href="#know-more4">How to customise badges with the Evolution machine?</a></p>
<p> </p>
<p><a name="know-more1"></a></p>
<p><strong>DESCRIPTION</strong></p>
<ul>
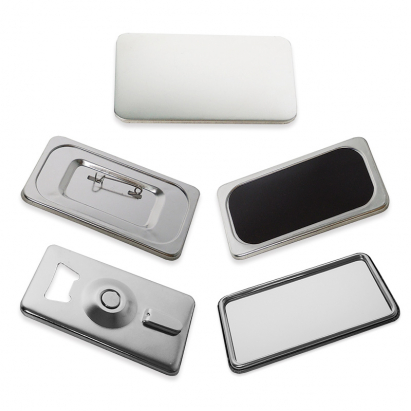
<li>1 complete badge consists of:<br>
<ul>
<li>1 transparent protective sheet (acetate)</li>
<li>1 front metal plate for placing the design</li>
<li>1 back metal plate, which varies according to the model</li>
</ul>
</li>
<li>Chrome-plated steel mould of <span class="azul-negrita">50 x 90 mm</span>, highly durable + <strong>provision</strong>: <br>
<ul>
<li><span class="azul-negrita">100</span> pin badges</li>
<li><span class="azul-negrita">20</span> magnet badges</li>
<li><span class="azul-negrita">20</span> mirror badges</li>
<li><span class="azul-negrita">20</span> bottle opener magnet badges</li>
</ul>
</li>
</ul>
<p> </p>
<p><a name="know-more2"></a></p>
<p><strong>THINGS TO KEEP IN MIND</strong></p>
<ul>
<li>The magnet for the magnet badges is supplied separately. It is flexible and comes with adhesive to attach it to the back</li>
<li>The mirror badges include a round cardboard stand</li>
<li>Each bag of badges includes 10 or 100<strong> complete badge sets</strong> (front + back + acetate)</li>
<li>Both the badges and the mould are compatible with the assembly machine: <a href="https://www.brildor.com/en/badge-making-machine-evolution" target="_blank" rel="noopener">Evolution</a></li>
</ul>
<p> </p>
<p><a name="know-more5"></a></p>
<p><strong>TEMPLATES FOR CUSTOMISATION</strong></p>
<p>To view the templates, open the PDF file using Photoshop. Remember to activate the layers:</p>
<p><a href="https://tinyurl.com/2b4ekl5k" target="_blank" rel="noopener">Special shape badge templates</a> (.pdf - 2 MB)</p>
<p> </p>
<p><a name="know-more4"></a></p>
<p><strong>HOW TO CUSTOMISE RECTANGULAR BADGES WITH THE EVOLUTION MACHINE?</strong></p>
<p><strong>STEP 1: Print the design</strong></p>
<ul>
<li>Always use a template with a cutting and bleed guide</li>
<li>Ensure the design has a margin for folding</li>
<li>Print on <span class="azul-negrita">100–110 g/m²</span> paper for optimal finish</li>
</ul>
<p><strong>STEP 2: Cut out the design</strong></p>
<ul>
<li>Cut along the outermost edge of the template</li>
<li>You can use scissors, a die-cutter, or a plotter depending on the volume and precision required</li>
</ul>
<p><strong>STEP 3: Assemble the badge</strong></p>
<ul>
<li>Install the rectangular mould<span class="azul-negrita"> 50 x 90 mm</span></li>
<li><strong>Part A of the mould</strong>:<br>
<ul>
<li>Place the front plate (sharp edge down)</li>
<li>Position the cut-out design on top</li>
<li>Add the protective sheet</li>
<li>Rotate the base to align <strong>Part A</strong> with the <strong>upper part</strong></li>
<li>Press the lever and lift it back up</li>
</ul>
</li>
<li><strong>Part B of the mould</strong>:
<ul>
<li>Place the back plate with the sharp edge up, aligning it with the pin. For mirror badges: first the frame (metal edge up), then the mirror (facing down), and finally the cardboard stand</li>
<li>Rotate the base to align it with the <strong>upper part</strong></li>
<li>Press the lever again</li>
<li>Your badge is now ready</li>
<li>For the magnet model, adhere the magnet to the back of the badge</li>
</ul>
</li>
</ul>https://www.brildor.com/media/catalog/product/c/h/chapas-rectangulares-50x90mm-d0-1_1.jpg259instock0259000https://www.brildor.com/media/catalog/product/c/h/chapas-rectangulares-50x90mm-d0-1_1.jpg2379523796252652526827082/Badges/Badges/Customisable Badges2021-07-24T06:09:55+0000