https://www.brildor.com/en/shield-badges-50x70mm25265Shield Badges - 50x70mm<p><a name="know-more1"></a></p>
<h2>More information about the Shield Badges - 50x70mm</h2>
<p><strong>INDEX</strong></p>
<p>> <a href="#know-more1">Description</a></p>
<p>> <a href="#know-more2">Things to keep in mind</a></p>
<p>> <a href="#know-more5">Templates for customisation</a></p>
<p>> <a href="#know-more4">How to customise badges with the Evolution machine?</a></p>
<p> </p>
<p><a name="know-more1"></a></p>
<p><strong>DESCRIPTION</strong></p>
<ul>
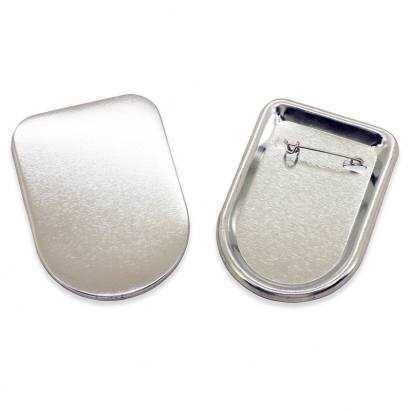
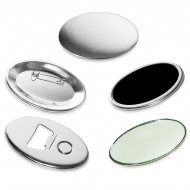
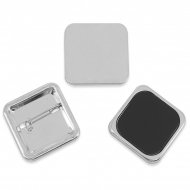
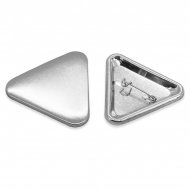
<li>1 complete badge consists of:<br>
<ul>
<li>1 transparent protective sheet (acetate)</li>
<li>1 front metal plate for placing the design</li>
<li>1 back metal plate with pin</li>
</ul>
</li>
<li>Chrome steel mould of <span class="azul-negrita">50 x 70 mm</span>, very durable + <strong>set of </strong><span class="azul-negrita">100</span> badges</li>
</ul>
<p> </p>
<p><a name="know-more2"></a></p>
<p><strong>THINGS TO KEEP IN MIND</strong></p>
<ul>
<li>Each badge bag includes 10 or 100<strong> complete badge sets</strong> (front + back + acetate)</li>
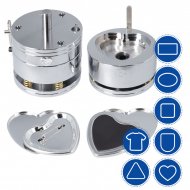
<li>Both the badges and the mould are compatible with the <a href="https://www.brildor.com/en/badge-making-machine-evolution" target="_blank" rel="noopener">Evolution</a> assembly machine</li>
</ul>
<p> </p>
<p><a name="know-more5"></a></p>
<p><strong>TEMPLATES FOR CUSTOMISATION</strong></p>
<p>To view the templates, open the PDF file using Photoshop. Remember to activate the layers:</p>
<p><a href="https://tinyurl.com/2b4ekl5k" target="_blank" rel="noopener">Special shape badge templates</a> (.pdf - 2 MB)</p>
<p> </p>
<p><a name="know-more4"></a></p>
<p><strong>HOW TO CUSTOMISE SHIELD BADGES WITH THE EVOLUTION MACHINE?</strong></p>
<p><strong>STEP 1: Print the design</strong></p>
<ul>
<li>Always use a template with a cutting and bleed guide</li>
<li>Ensure the design has a margin for folding</li>
<li>Print on <span class="azul-negrita">100–110 g/m²</span> paper for optimal finish</li>
</ul>
<p><strong>STEP 2: Cut the design</strong></p>
<ul>
<li>Cut along the outermost edge of the template</li>
<li>You can use scissors, a die-cutter, or a plotter depending on the volume and precision needed</li>
</ul>
<p><strong>STEP 3: Assemble the badge</strong></p>
<ul>
<li>Install the shield mould <span class="azul-negrita">50 x 70 mm</span></li>
<li><strong>Part A of the mould</strong>:<br>
<ul>
<li>Place the front plate (sharp edge downwards)</li>
<li>Position the cut design on top</li>
<li>Add the protective sheet</li>
<li>Rotate the base to align <strong>Part A</strong> with the <strong>top part</strong></li>
<li>Press the lever and lift it back up</li>
</ul>
</li>
<li><strong>Part B of the mould</strong>:
<ul>
<li>Place the back plate with the sharp edge upwards, aligning it with the peg</li>
<li>Rotate the base to align it with the <strong>top part</strong></li>
<li>Press the lever again</li>
<li>Your badge is now ready</li>
</ul>
</li>
</ul>https://www.brildor.com/media/catalog/product/c/h/chapas-escudo-50x70mm-d7.jpg229instock0229000https://www.brildor.com/media/catalog/product/c/h/chapas-escudo-50x70mm-d7.jpg23038237872379523796252682708248759/Badges/Badges/Customisable Badges2021-07-24T06:09:34+0000